Contribute to Open Source Docs via "Edit this page" on GitHub
With open source projects, not only can you see the code, you can help edit and maintain the code, too!
Here’s an example of how you can contribute to Astro’s documentation, right from your browser!
Edit this page
On every page of the Astro documentation, there is a pencil icon and a link to “Edit this page” in the right hand sidebar.
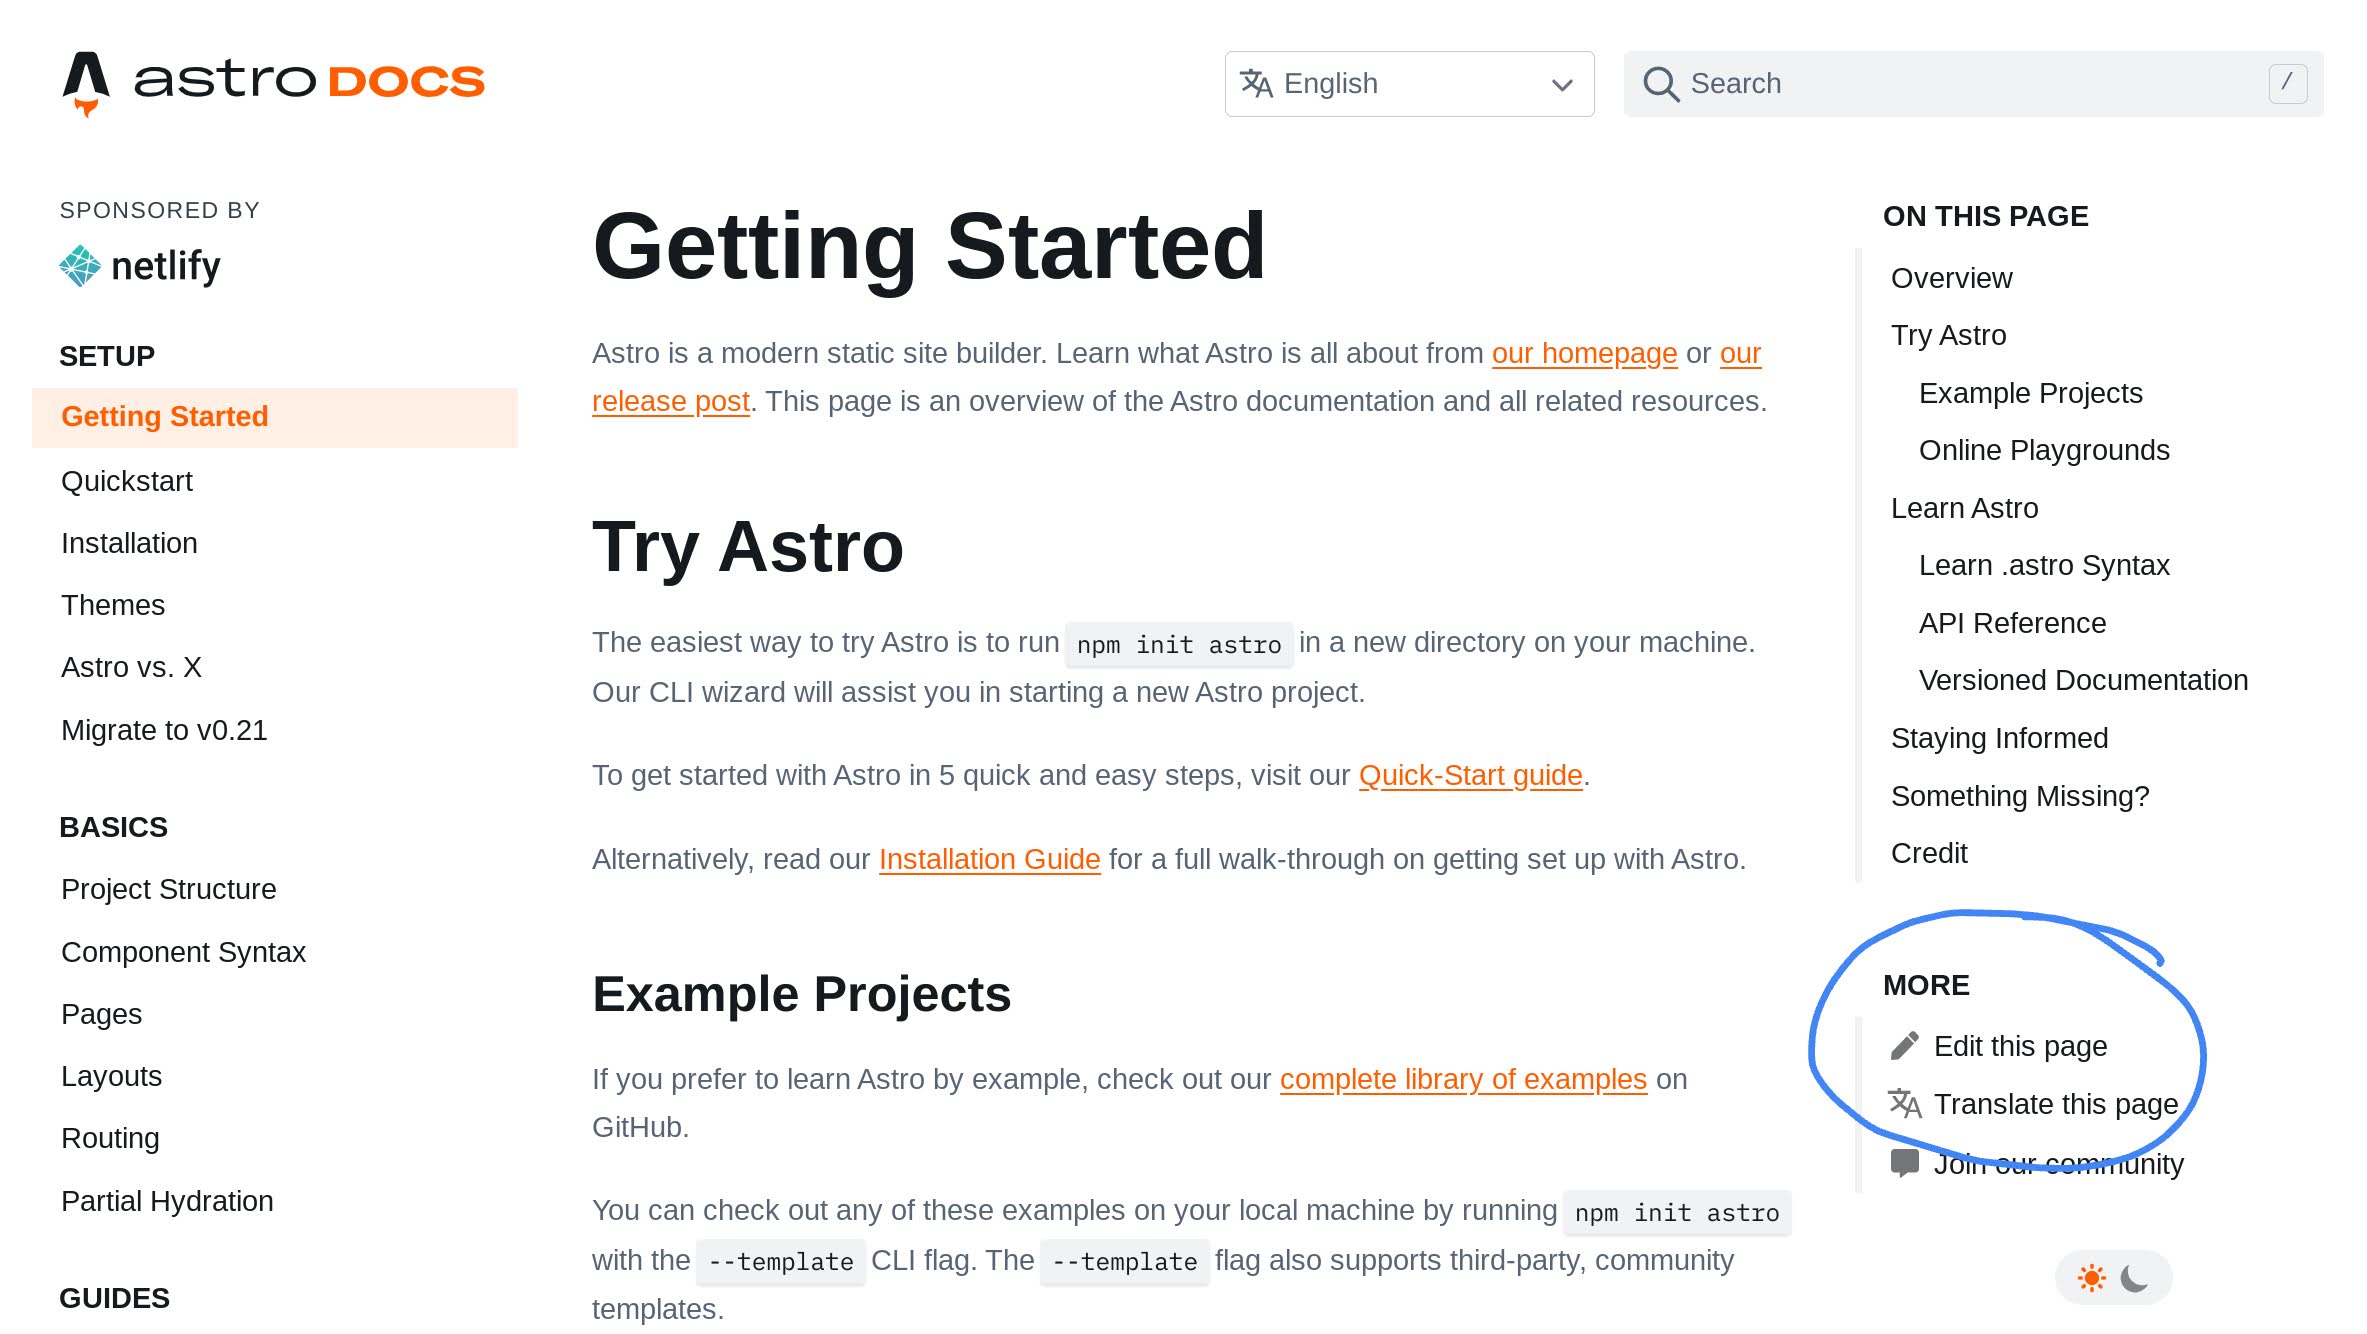
Click this link! Your browser will navigate to the Astro Docs source repository on GitHub, taking you directly to the file for the page you’re viewing.
To make a contribution to this file, select the pencil icon to edit. If you are not logged in, you will be prompted to log in to GitHub.
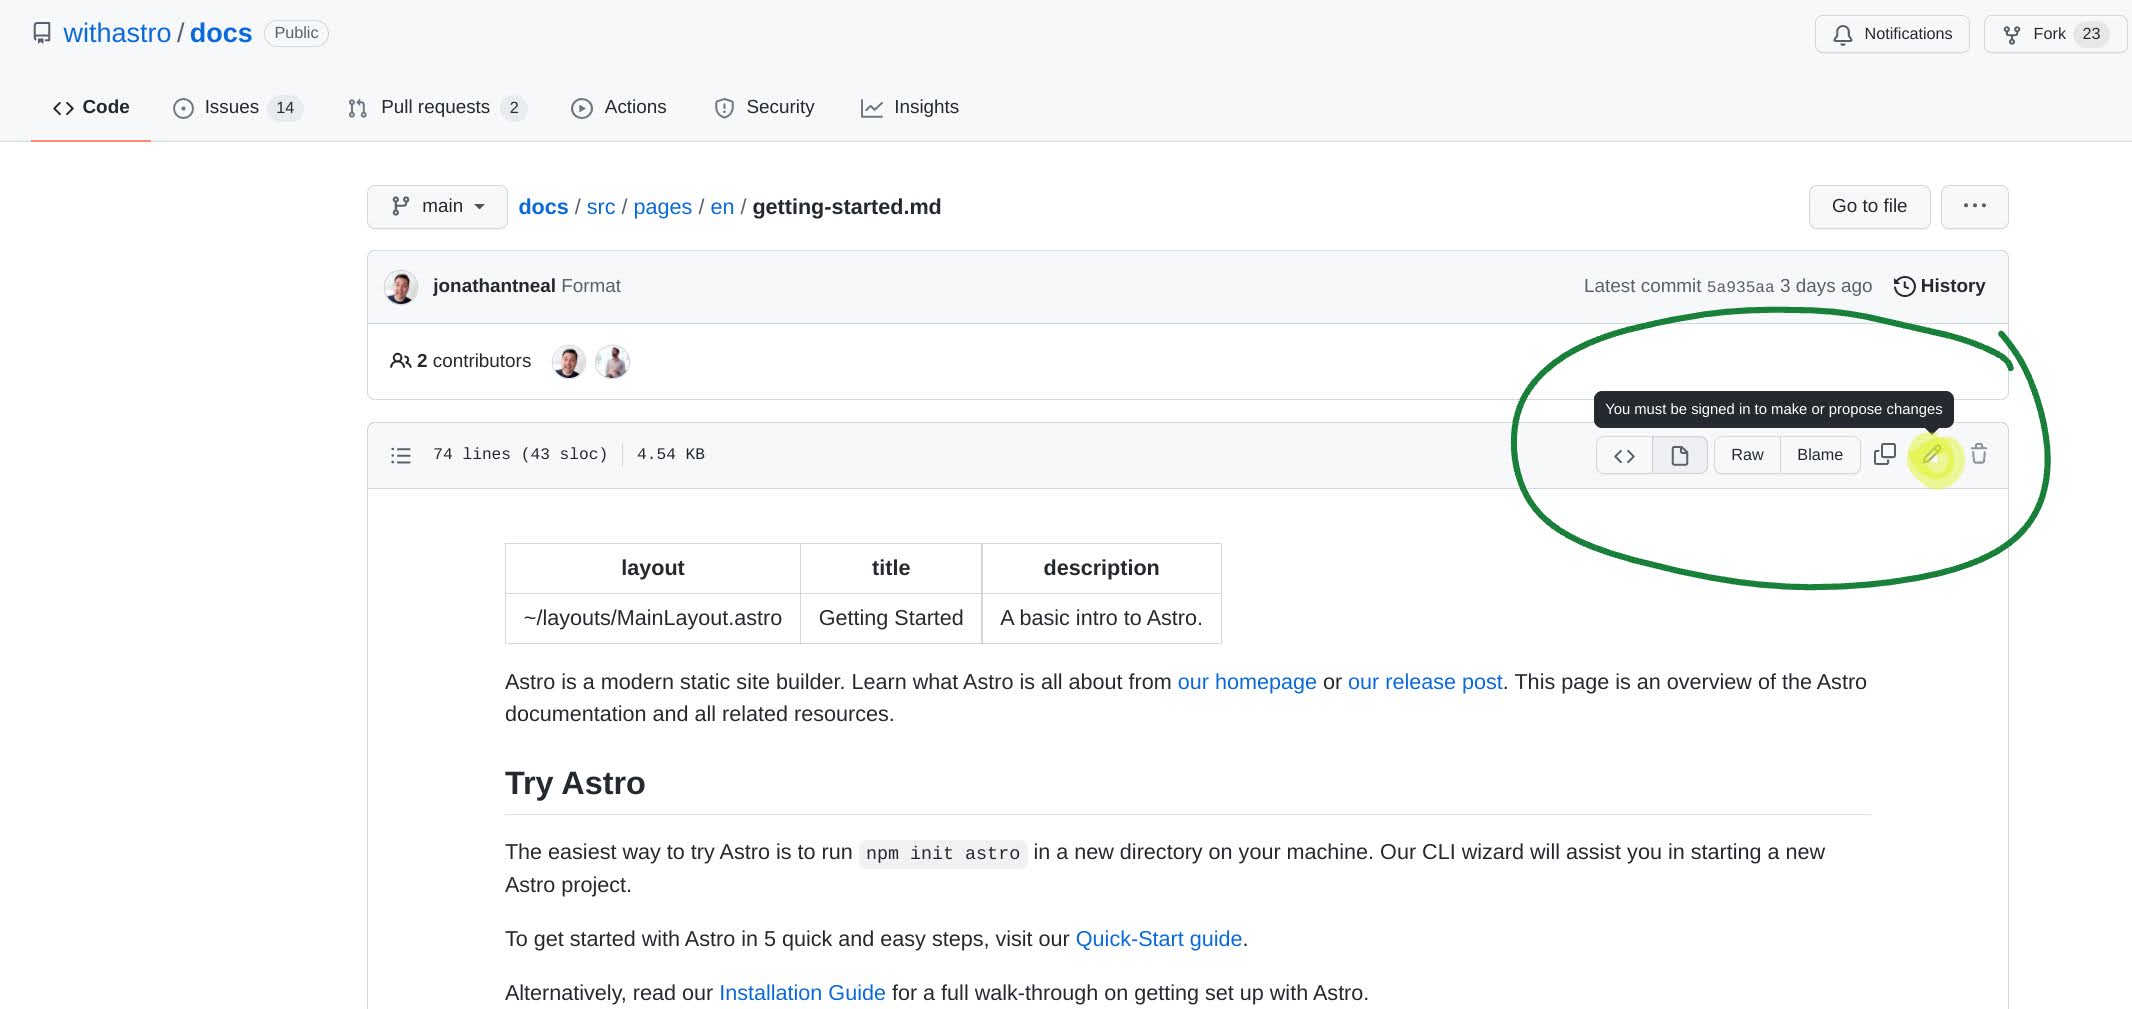
If you are logged in, the pencil icon will take you to edit this file in your fork of this project.
(If this is your first time editing a project, a “fork” (cloned copy) of this project will automatically be created in your own GitHub account. Yay! You now own a copy of the Astro docs!)
Propose Changes
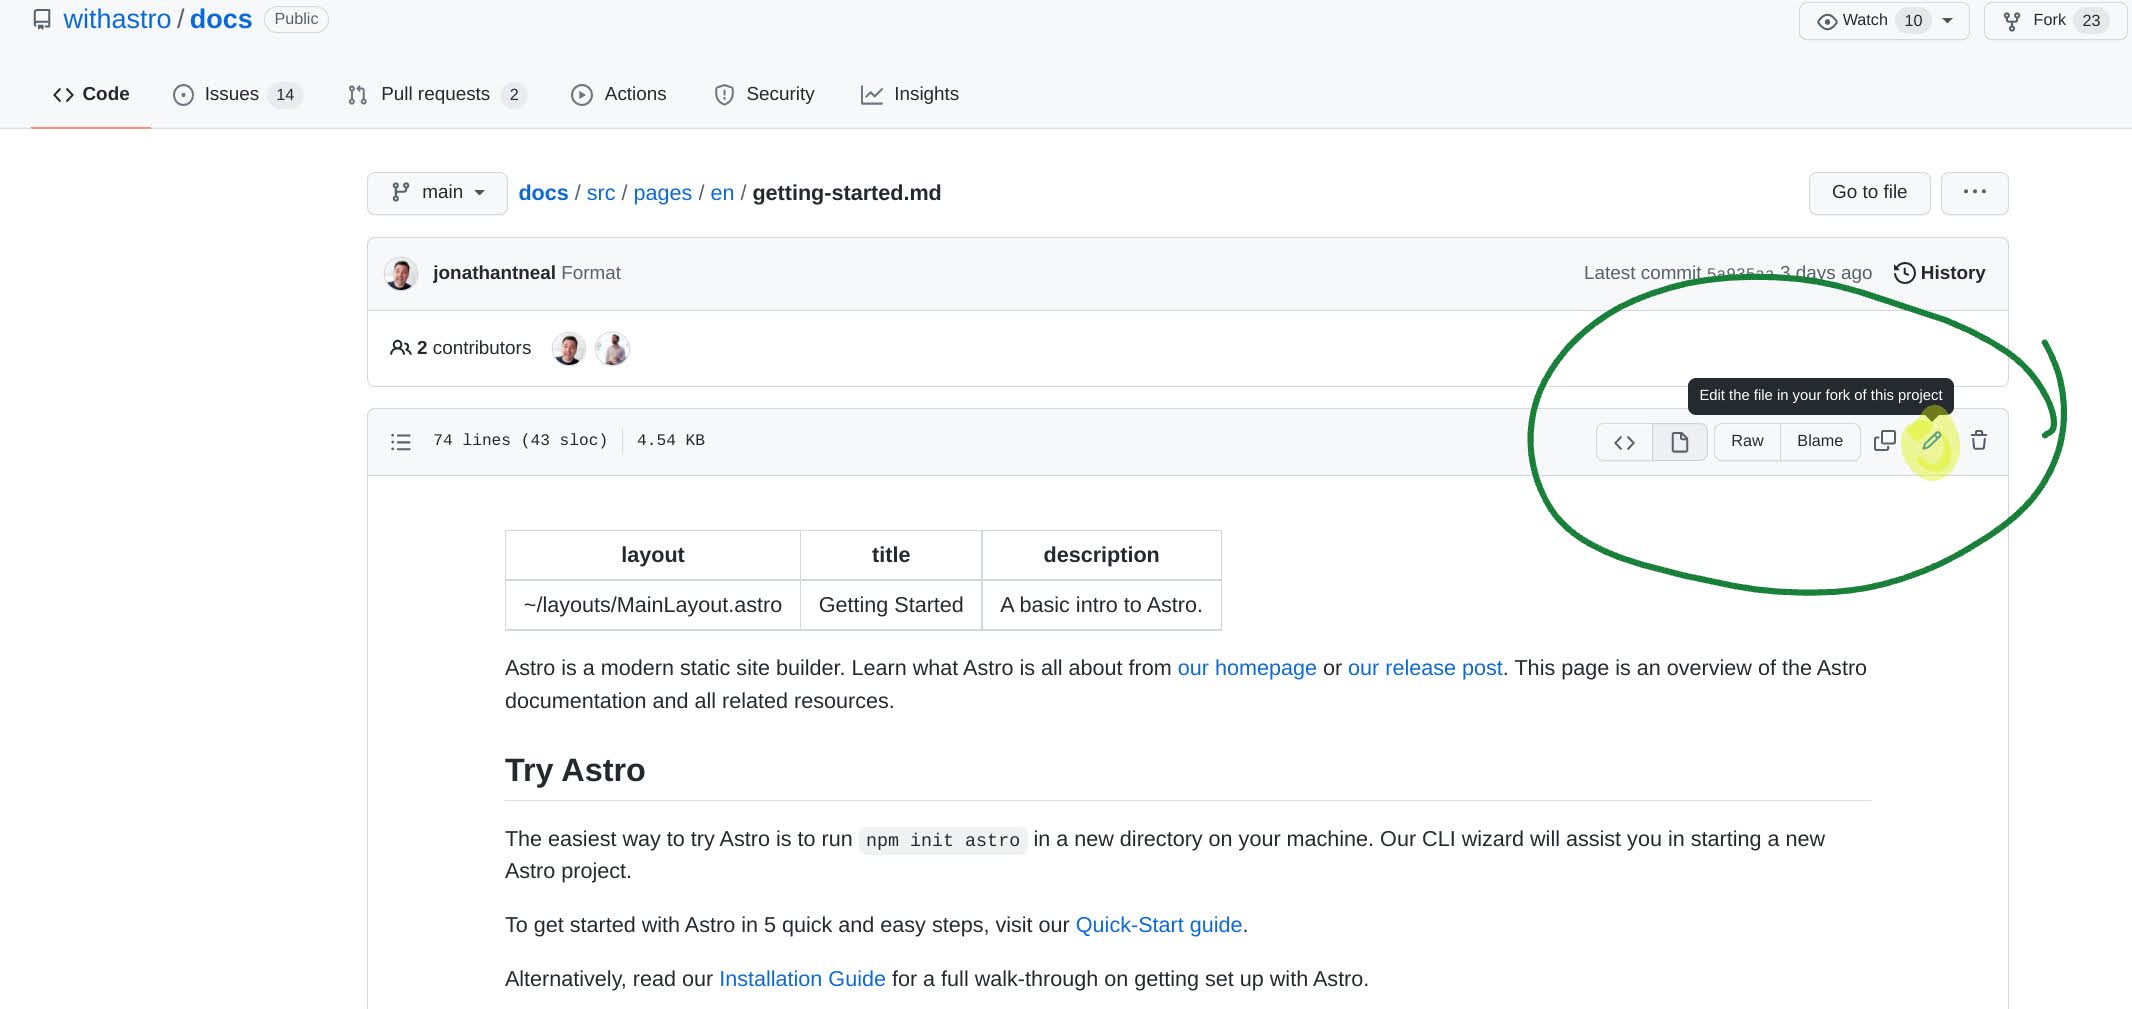
After clicking the pencil icon to edit that file, you will be greeted by a banner reminding you that you do not have permission to make changes directly to the file. Instead, you will make changes in your own copy of the document, then submit a pull request to the original project.
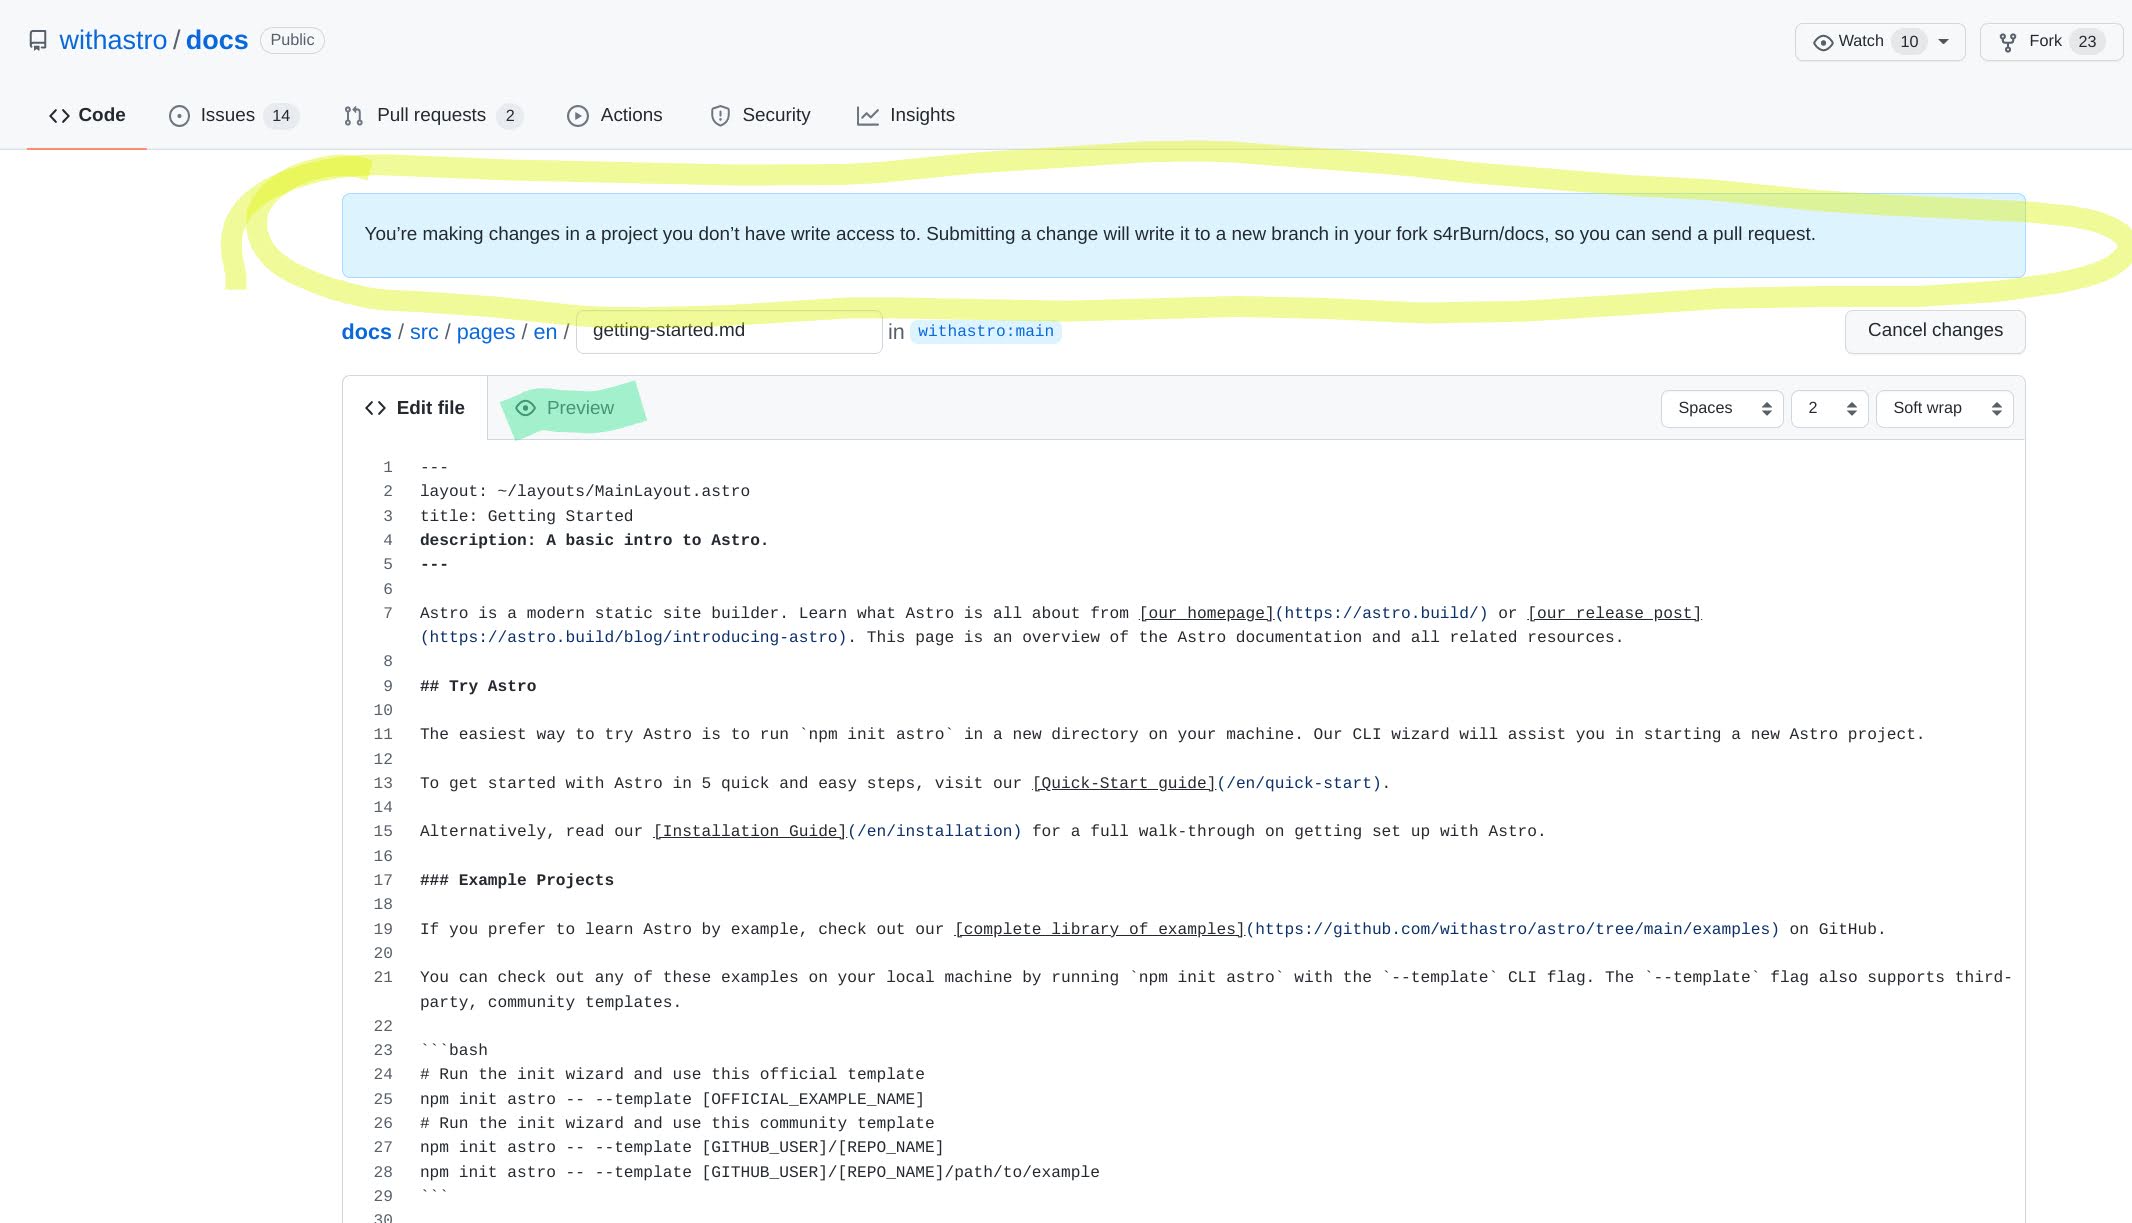
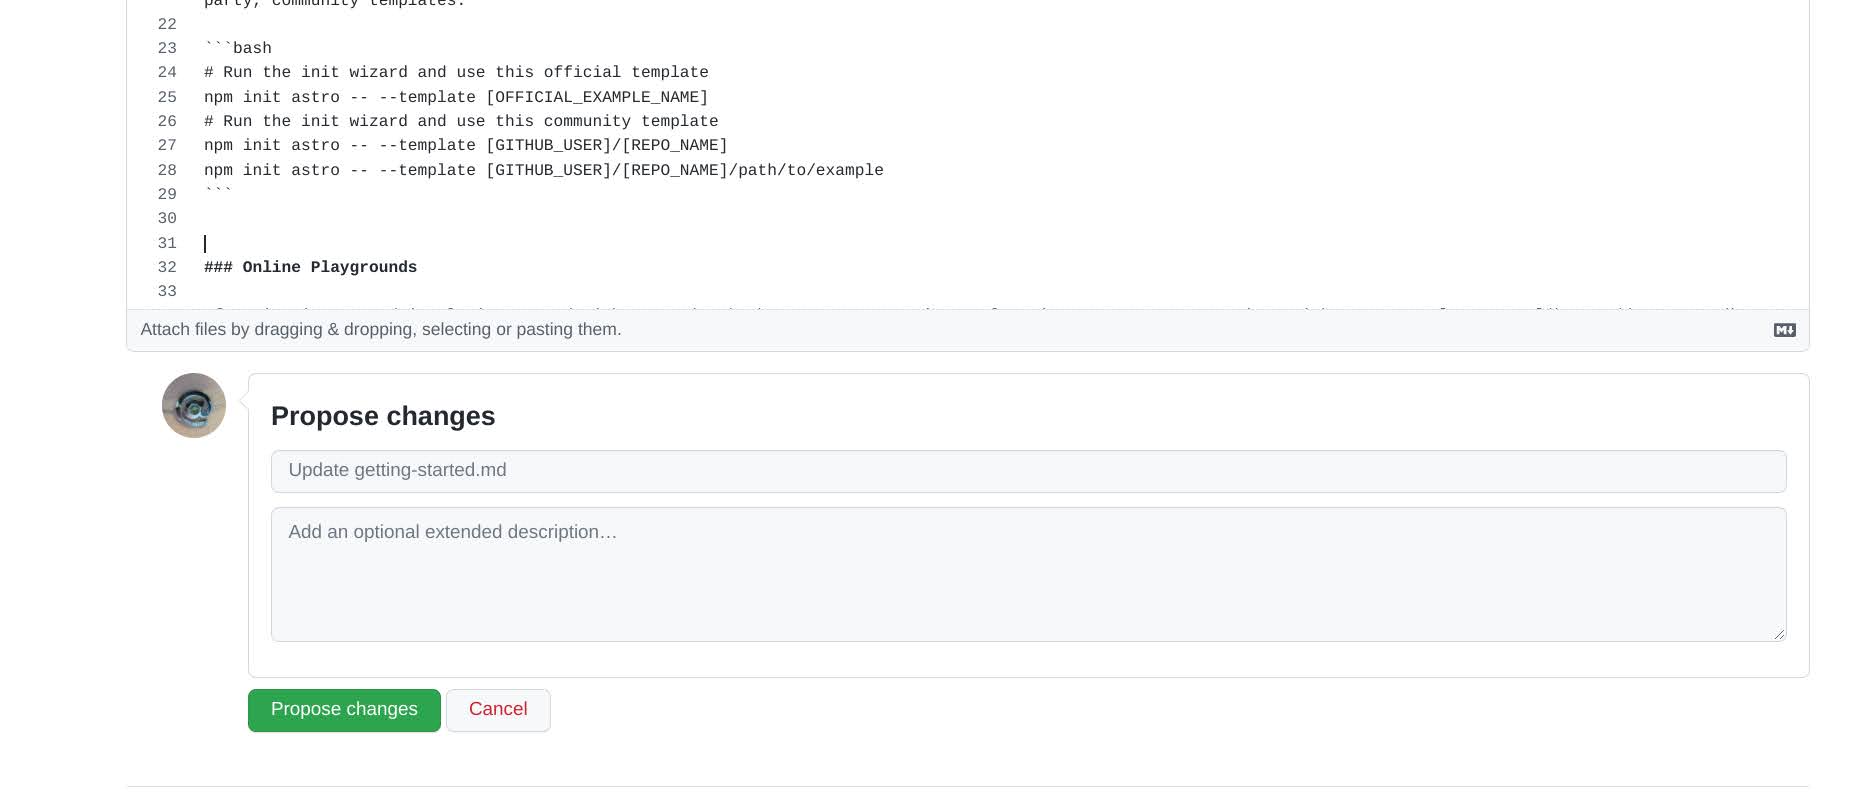
In edit mode, you can toggle between typing Markdown source code and previewing those changes on the page.
Once you have made changes, use the “Propose Changes” button at the bottom of the page to submit your new version of the page to the Open Source project for consideration.
Be sure to include a short but descriptive title of what you changed, and optionally, a longer description. This could be a more thorough explanation of what you changed, or why you believe the change was necessary or appropriate.
After “proposing changes,” you’ll still have two more steps to go (and two more chances to back out!) in order to create a pull request. So there’s absolutely no risk in going this far!
Create a pull request
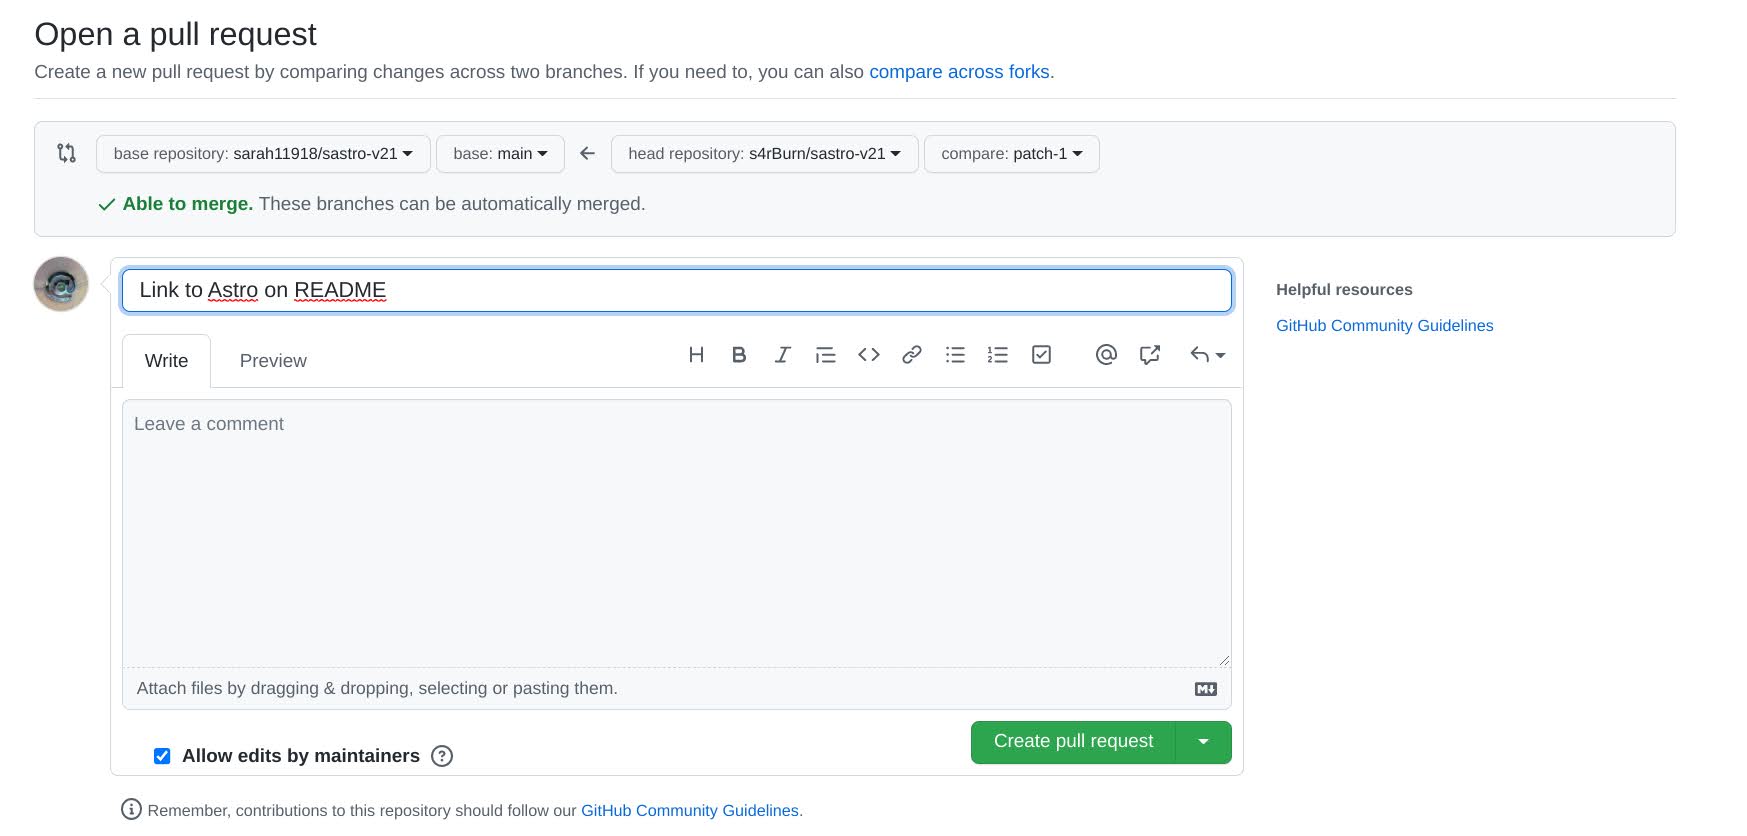
Next, you’ll be taken to a page that performs a check to make sure that your changes are able to be merged, without conflict, into the open source repository.
It’s at this point that you’ll click the submit button to “create a pull request” (PR)… but this is only the button that takes you to another page where you’ll have a chance to edit your PRs title and description before actually sending your proposed changes to the original repository.
It’s totally safe to click here! You’ve still got one more chance to back out!

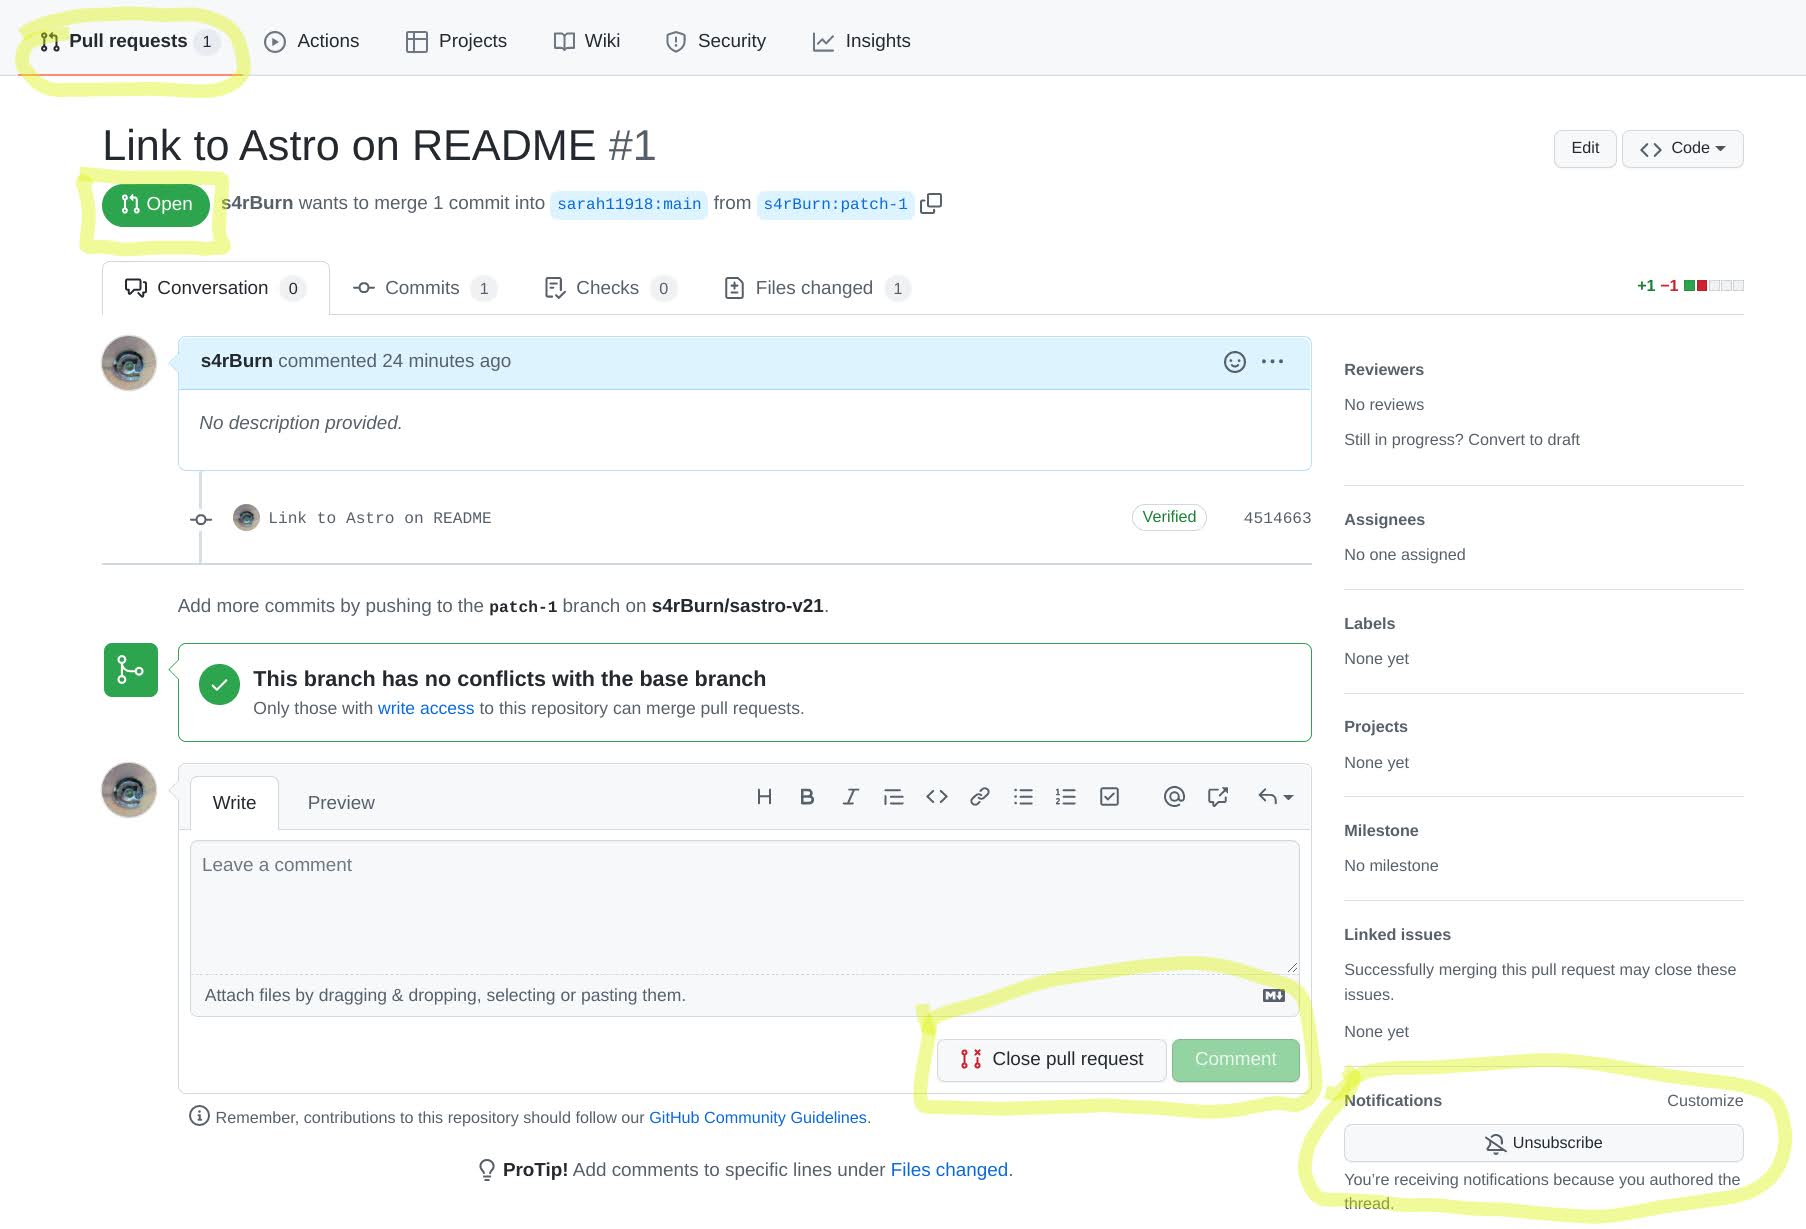
The next page you’ll reach will again confirm that your changes can be merged without creating a conflict, and will allow you to adjust your title and description as necessary. (This screenshot shows a pull request to one of my own repositories this time, instead of the Astro docs.)
⚠️ When you click “Create a pull request” on this screen, now you actually create a pull request! This one counts!
Here, you can leave a comment in Markdown, and also preview your comment. So, if you’d like to add a more descriptive or elaborate description of your changes here using standard Markdown lists, formatting, code blocks… you can also upload images or gifs, such as before and after screenshots.
Also, there is a checkbox (selected by default) at the bottom, just before the submit button, for allowing edits by maintainers. This allows a maintainer of the project to accept your pull request while still making a change like fixing a typo or addressing a style issue. Please leave this box checked.
By checking this box, you’re allowing the maintainer to modify your changes which improves the chances that they can accept your pull request even if it is not perfect. Otherwise, if the maintainer cannot accept your changes exactly as you’ve proposed them, they will need to ask you to make changes and resubmit, or will be forced to deny your proposed changes entirely.
Once you are satisfied with the content of your pull request, click the button to submit (for realz!) and you’ll be taken to a confirmation screen that shows your “open” pull request, in the original repository.
Success!
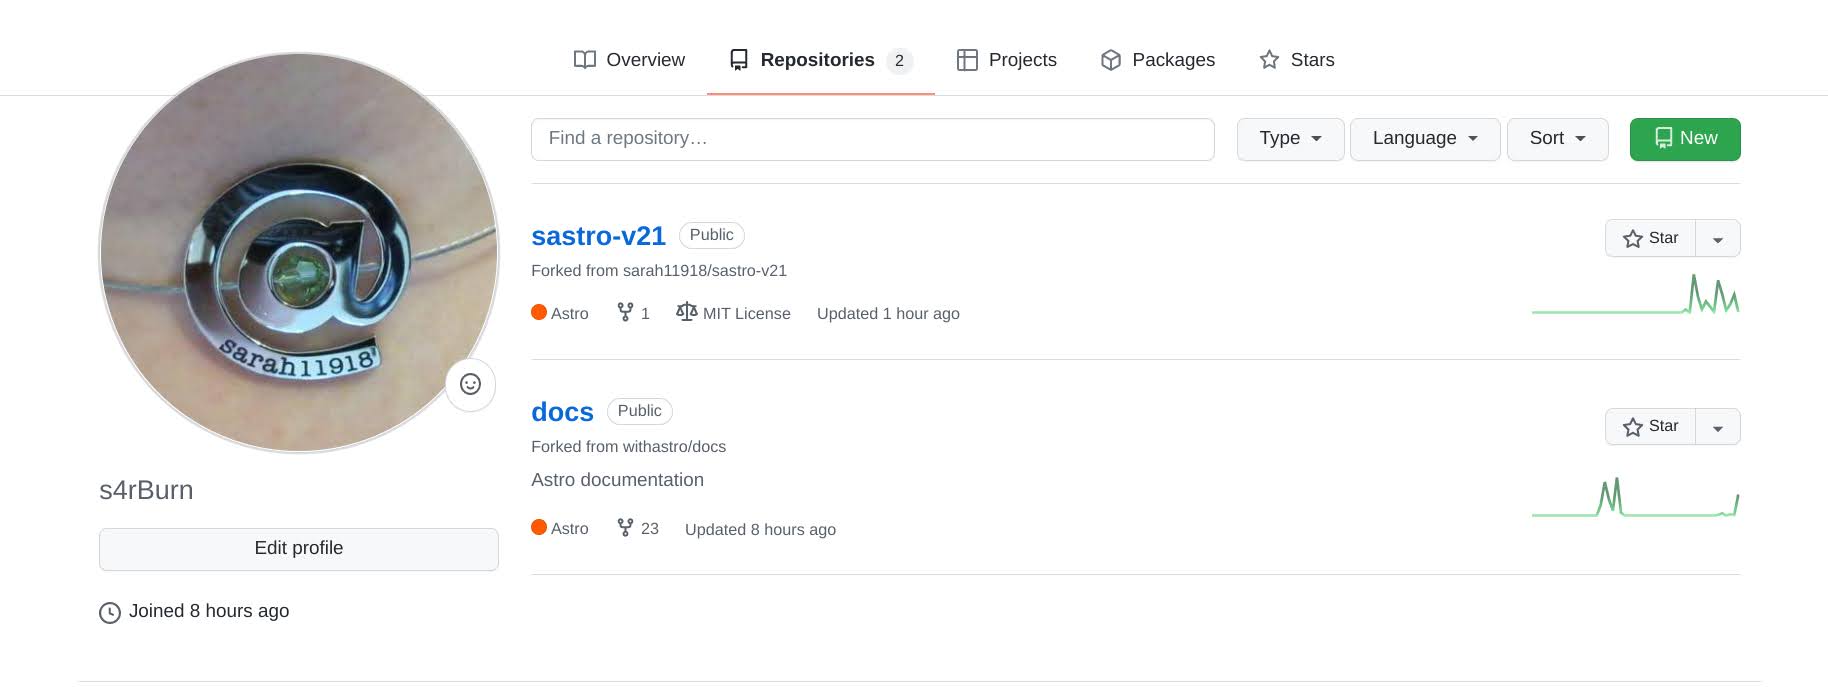
Congratulations! Your contribution has left your hands! Your pull request joins all the other pull requests (the total number is shown in the upper left of the screen with) to that project.
You can still add a follow up comment or decide to close the pull request at any time by revisiting this page. You can’t “delete” a pull request, but you can “close” it to let the maintainers of the project know that you are withdrawing your proposed changes. The pull request continues to exist, (and can even be re-opened with the press of a button!) but closed PRs are typically hidden out of sight behind a default filter that only shows “open” (in progress) pull requests.
Also be aware that you will be automatically subscribed to receive notifications for any activity on this pull request. You can customize your notification preferences, but by default, you will receive a GitHub notification (based on your account’s notification settings) when there is any activity on your request.
Continuing to Contribute
Your GitHub profile will now contain local copies, that you own, of the repositories to which you submitted changes. This means, you can easily revisit them at any time and contribute again and again!
You can continue to edit files on GitHub, or you can open these repositories however you prefer to work on them: locally on your machine, in an online development environment or code editor like Gitpod or CodeSandbox, or by using the handy . (period key) shortcut while on GitHub to open github.dev for a VS Code editing experience.
⚠️ Avoid merge conflicts!
During the course of submitting your pull request, GitHub checked multiple times to make sure your changes could be merged into the original repository without any conflicts. Remember, the open source project probably has several people contributing to it, and it is changing all the time! (Even if you only work on your local copy every now and then.)
Before you begin editing this fork again, you should always fetch upstream so that your project incorporates any new changes since the last time you contributed. This ensures that any new changes you propose are compatible with the most up-to-date, current version of the project.
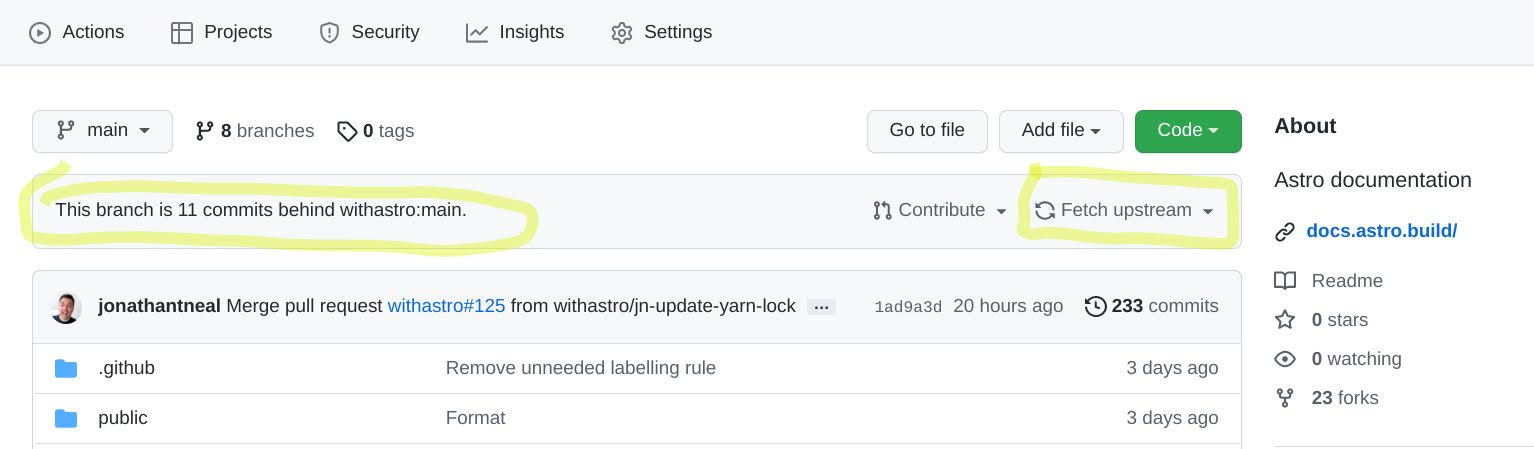
Navigating into one of your repositories should show you if your forked copy of the project is behind (i.e. not caught up with changes to) the original. There will also be an option to “fetch upstream” which will add all the new changes, and project commit history of the original project to your own.
Always do fetch upstream first, before starting to make changes to your local copy!
There is even a handy GitHub app called “Pull” that you can authorize to run automatically to perform this action at regular intervals. This avoids you going a long time without fetching and keeps you up generally up to date on any changes in the original project that could conflicting with what’s in your local copy. You should still fetch manually right before each work session though, to catch any up-to-the-minute changes before you begin editing.
Any changes you make here in your fork are only local changes, contained in your repository. So feel free to experiment! You don’t have to send your changes back every time you make them… or, ever! You can work independently for as long as you want and make as many commits to your own project as you like. (Just remember to fetch upstream each time you begin again, to keep up-to-date with any upstream changes.)
When you do have new changes commited to your local fork of the project that you want to contribute back via a new pull request, go back to your repository’s main page. Instead of “fetching upstream,” this time you can “Contribute” back to the original project. (These options are next to each other on the page.)
“Contribute” will start the process for a brand new pull request, first by checking for merge conflicts, and then by allowing you to provide a good title and description for your changes. Your pull request, once opened, is attached to the original project for review, and the cycle begins again!
Thank you for contributing to open source!
© 2021 - 2024 Sarah Rainsberger. Except where otherwise noted, and/or quoting external sources, the content of this site is licensed under CC BY-NC-SA 4.0 ![]()
![]()
![]()
![]()